Choosing the right Shower Faucet Handles involves more than matching a finish to your bathroom. The handles must work with the faucet valve already behind the wall. A handle that looks compatible may not fit the valve or control water correctly. Check the faucet’s brand, model, valve type, and installation details before buying. If those details are unclear, contact the manufacturer or ask a qualified plumbing professional.
Think about daily use, too. Do you prefer one lever that adjusts temperature and flow, or separate handles for hot and cold water? A lever may be easier to operate with wet hands, while two handles can suit a traditional design. Grip the handle if you can. Small details matter. A slippery shape or stiff movement can become annoying over time. Also consider who uses the shower, including children or anyone with limited hand strength.
Finish and style come next, but they should not outweigh fit and function. Compare the handle’s finish with nearby fixtures, and check the care instructions; some coatings need gentler cleaning than others. Measure the available space and confirm that the handle clears nearby walls or trim. A beautiful handle can still feel wrong once installed. There is no perfect choice for every bathroom, and product descriptions do not always make compatibility obvious. This guide will help you compare handle styles, materials, installation requirements, and practical features so you can make a more informed choice.
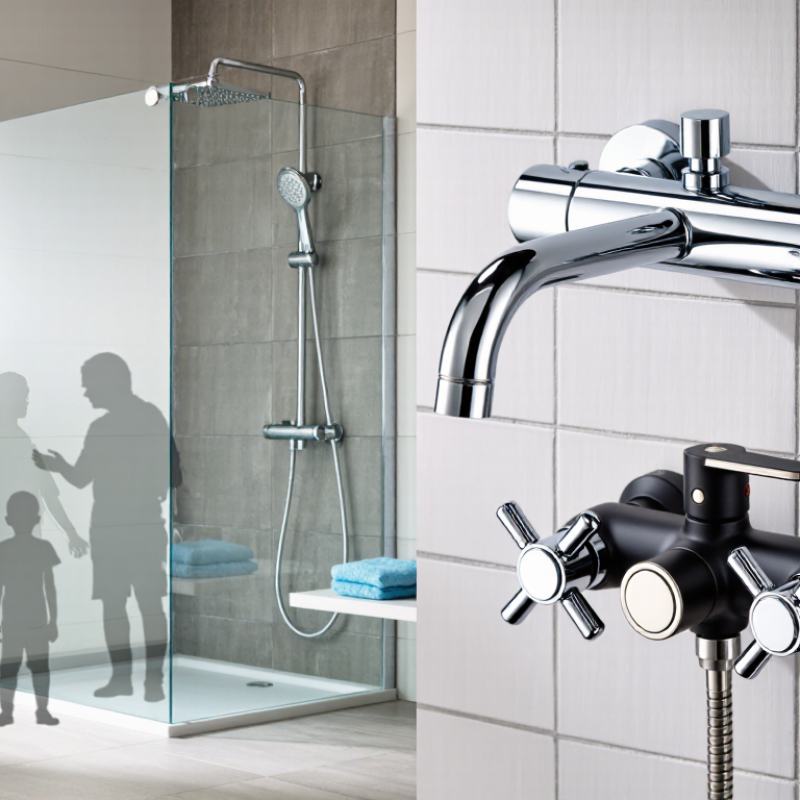
A shower handle must match the valve stem beneath it. Remove the old handle and inspect the stem’s shape, spline count, diameter, and length. Also check whether the valve turns or pulls to control water. A handle that fits loosely can wobble, damage the stem, or fail to operate the valve smoothly. Looks can mislead.
ASME A112.18.1/CSA B125.1 sets performance requirements for plumbing supply fittings. Check product documentation for compliance; a matching handle alone does not establish that the complete fitting meets the standard. The U.S. EPA’s WaterSense Specification for Showerheads sets a maximum flow rate of 2.0 gallons per minute. That figure concerns the showerhead, not the handle, but it helps frame performance expectations when updating shower components. Confirm that replacement trim is intended for your valve type, and do not assume similar-looking stems are interchangeable.
Tips: Take a clear photo of the exposed stem and measure it before shopping. Compare the details with the valve documentation, including rotation direction and screw position. If the valve model is unknown, pause before ordering. A careful visual match can still miss a small but important difference.
Identify valve stem compatibility and confirm ASME A112.18.1/CSA B125.1 compliance.
How to use this checklist: Each bar marks an item to verify before buying; it is not a rating or a pass result. Compare the handle connection and stem dimensions with the existing valve, and confirm compliance for the specific faucet or fitting through its product documentation. A matching handle alone does not establish compliance.
Lever handles are often easiest to move with wet hands because they need only a push or lift. Their longer shape also gives good leverage when turning the water on or adjusting temperature. Check that the handle clears nearby walls or shelves. A lever can feel awkward if the space is tight.
Cross handles offer clear visual control: one side may control hot water, the other cold, depending on the faucet setup. Their separate arms can be easy to grasp, but small or smooth crosses may slip under soapy fingers. Knob handles take less space and suit compact showers. However, they usually need a firmer grip and a full turn, which can be difficult for people with limited hand strength. Grip matters. A textured surface can help, but sharp edges may feel uncomfortable.
Try the motion before choosing, if possible. Turn each handle with damp fingers and notice whether you can adjust the temperature in small, predictable steps. A handle’s shape does not determine how precisely the shower controls work; the valve inside matters too. Confirm compatibility with the existing valve before replacing handles, since similar-looking fittings may not connect. There is no perfect shape for everyone. I might choose a lever for quick adjustments, then change my mind after finding it bumps the shower screen.
The ADA’s 5-pound-force (5 lbf) limit is a useful reference when assessing accessible faucet controls. Where accessibility requirements apply, an operable part must not need more than 5 lbf to activate. It must also work with one hand, without tight grasping, pinching, or wrist twisting. This gives you a concrete benchmark, but it cannot guarantee that every handle will feel comfortable. Feel matters, too.
A wide lever can be easier to operate than a small round knob, especially with wet hands or limited grip strength. For a more reliable check, use a force gauge at the point where a hand would normally push or pull, and test the handle through its usual movement. A casual hand test can hint at difficulty, but it is not a measurement. Handle shape, mounting position, and water pressure can all affect the experience. I would not judge a faucet by the number alone; personal comfort still matters. Confirm which accessibility rules apply to your project, and consider having a qualified professional assess the control.
When choosing shower faucet handles, check their height before selecting a style. A 38–48-inch range can be a useful planning target, but it is not a universal ADA requirement. ADA reach limits depend on the approach and any obstruction; under qualifying conditions, operable parts generally must be reachable from no higher than 48 inches above the finished floor. Confirm the rules that apply to your project.
Measure from the finished shower floor to the handle’s operable part, not from the subfloor or rough plumbing. Tile and a shower pan can change the final height by an inch or more. A handle placed near the upper end may be difficult to reach from a seated position, especially if a ledge or fixed glass panel blocks the approach. Small detail. Check the actual reach.
The handle should also be easy to operate with a closed fist, without tight pinching or twisting. Lever-style controls often help, but the shape alone does not guarantee accessibility. Test the reach from the shower entrance and, where relevant, from a seat. If the valve location is already fixed, mark the finished-floor height on the wall and compare it with the planned handle position before installation. That extra check can feel fussy, yet moving a control after tile is installed is much harder.
A shower handle is touched with wet, soapy hands every day, so its material and finish matter beyond appearance. Solid brass and stainless steel are commonly chosen for their resistance to corrosion; zinc-alloy handles can cost less, but coating quality deserves close inspection. Feel the difference. A loose handle or thin, uneven plating may become irritating long before the faucet stops working.
Finish affects upkeep, too. Polished chrome is easy to wipe but shows water spots; brushed finishes tend to disguise fingerprints. Water Quality Association estimates that about 85% of U.S. homes have hard water, which can leave mineral deposits on handles. That figure is a useful reminder, not a prediction for every home: local water varies. Look for a smooth, consistent coating, and check the maker’s care instructions before using cleaners. Harsh abrasives can dull or scratch many finishes. Not every coating lasts.
Tips: Compare finish samples under your bathroom lighting. Leave a drop of water on each, let it dry, then check for visible spots. For routine cleaning, use a soft cloth and mild soap; avoid scouring pads and acidic cleaners unless the care guide permits them. A small compromise: brushed finishes hide marks well, but may still need frequent wiping in a busy bathroom.
Remove the old handle and inspect the exposed stem. Check its shape, spline count, diameter, length, screw position, and turning direction. Looks can mislead.
Not always. Small differences can prevent a secure fit or smooth operation. Compare the stem with valve documentation, and pause if the valve model is unknown.
No. ASME A112.18.1/CSA B125.1 applies to plumbing supply fitting performance. Check product documentation; a handle match alone proves nothing about the complete fitting.
No. The WaterSense showerhead specification sets a maximum flow rate of 2.0 gallons per minute. It concerns the showerhead, not the handle.
Levers often need only a push or lift and provide useful turning leverage. Cross handles can be easy to grasp, while smooth ones may slip. Knobs save space but often need a firmer grip.
Try moving it with damp fingers, if possible. Check whether temperature changes feel predictable and whether the handle clears nearby walls or shelves. I might prefer a lever, then find it bumps the shower screen.
Where accessibility requirements apply, an operable part must not require more than 5 pounds-force to activate. It must work with one hand, without tight grasping, pinching, or wrist twisting.
No. A force gauge can measure pressure where a hand normally pushes or pulls. A casual test offers only a clue. Personal comfort still matters.
Choosing the right Shower Faucet Handles starts with confirming that the handle fits the valve stem and that the faucet assembly meets applicable ASME A112.18.1/CSA B125.1 requirements. Then consider how different shapes feel in use: levers can be easier to operate with a small or closed grip, while cross and knob handles may offer a familiar, compact design. Compare them for comfort and precise temperature and flow control, rather than choosing by appearance alone.
For easier access, assess whether the handle can be operated with no more than 5 pounds of force and whether shower controls are positioned within the ADA’s 38–48-inch range. Finally, choose materials and finishes suited to frequent moisture and cleaning. Durable surfaces that resist corrosion, water marks, and wear can help maintain both appearance and performance over time.