What Is the Best Way to Fix a Faucet Handle?

Time:2026-10-08 Author:Aria
0%

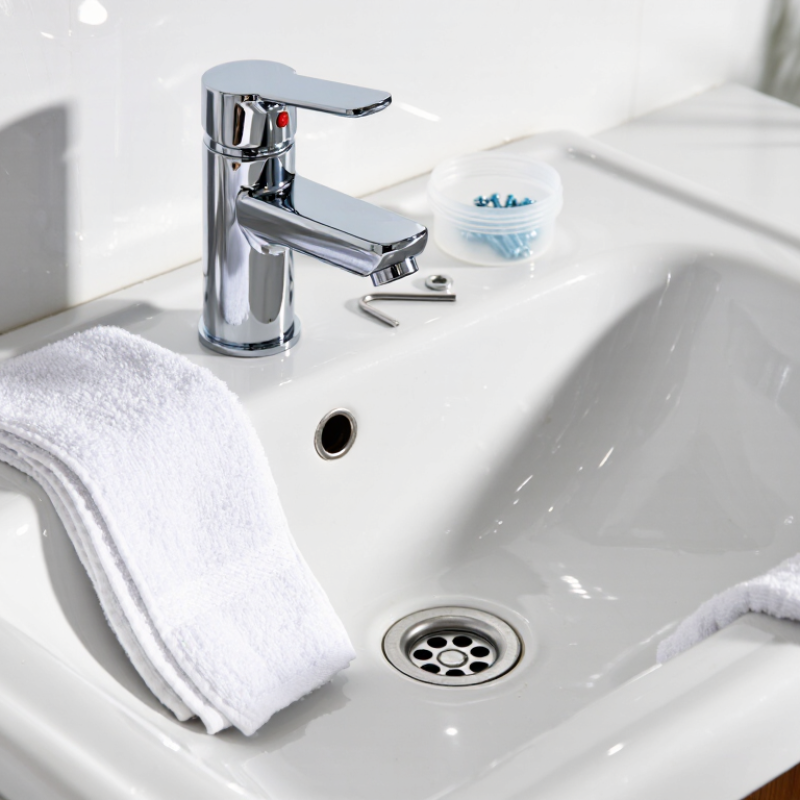
A loose, stiff, or spinning faucet handle can turn a simple repair into a frustrating plumbing problem. The best method depends on the failure: a missing screw, worn cartridge, damaged stem, or mineral buildup. Before touching anything, shut off the water supply beneath the sink. Place a towel over the drain and keep a small container nearby for screws and washers. These small preparations prevent lost parts and unnecessary mess.

Richard Trethewey, a longtime plumbing expert known for his work on This Old House, has offered a practical reminder: “The best repair starts with understanding why the handle failed.” That principle guides effective Fixing Faucet Handle work. Removing the decorative cap may reveal a hidden screw. A hex key might be required instead of a screwdriver. If the handle resists, forcing it can crack the fixture or strip the fastener. Patience matters.

The repair should be systematic, not rushed. Photograph each part before removal, and compare replacement components carefully. A universal handle may fit poorly, even when its packaging sounds convincing. Clean mineral deposits gently with vinegar and a soft brush, but avoid damaging plated surfaces. After reassembly, turn the water on slowly and check for leaks around the stem and supply connections.

Some repairs remain uncertain. A corroded valve body or seized cartridge may require professional help. That is not failure; it is sound judgment. This guide explains practical inspection steps, common tools, and safer repair choices for homeowners. It also recognizes an uncomfortable truth: the quickest-looking fix is not always the most reliable one.
What Is the Best Way to Fix a Faucet Handle?

Identify the Faucet Handle Problem and Gather the Required Tools

Before repairing a faucet handle, identify the symptom instead of guessing. A handle that wobbles often has a loose screw or worn adapter. A dripping spout may indicate a damaged cartridge, valve stem, or O-ring. Hard turning can signal mineral buildup or internal corrosion. My first diagnosis was once wrong: I replaced a cartridge when the real problem was a loose retaining nut.

Start by closing the hot and cold shutoff valves beneath the sink. Open the faucet to release pressure, then cover the drain with a cloth. You will usually need a flat-head or Phillips screwdriver, an Allen key, an adjustable wrench, a flashlight, and a small container. Keep replacement washers or O-rings nearby, but remove the old part first. Faucet designs vary more than online photos suggest.

The U.S. EPA WaterSense program reports that household leaks waste nearly 1 trillion gallons of water yearly. It also estimates that a faucet dripping once per second can waste more than 3,000 gallons annually. Those figures make diagnosis worthwhile, but they do not justify forcing a seized handle. Use gentle penetrating oil where appropriate, and pause if the valve body begins twisting. A simple photo before disassembly can prevent an embarrassing mistake. Loose parts are common. Hidden damage is less obvious.

What Is the Best Way to Fix a Faucet Handle?

Identify the faucet handle problem first, then gather the tools needed for the repair.

Loose handles usually require tightening a set screw, while dripping or difficult-to-turn handles may require cleaning, cartridge inspection, or replacement. Before starting, prepare a screwdriver, adjustable wrench, hex keys, penetrating oil, plumber’s grease, a cloth, and replacement parts if necessary. Turn off the water supply before removing the handle.

Shut Off the Water Supply and Remove the Handle Safely

What Is the Best Way to Fix a Faucet Handle?

Shut off the water supply before touching the handle. Look beneath the sink for two small shutoff valves. Turn each valve clockwise until it stops gently. Do not force an old valve. If no local valves exist, close the main water supply. Open the faucet briefly to release pressure and drain trapped water. This simple step prevents sudden spray and protects the cabinet from water damage.

Cover the drain with a cloth. Small screws can disappear quickly. Check the handle for a visible screw or a decorative cap. Lift the cap carefully with a thin flat tool, protecting the finish with tape. Loosen the screw slowly, then pull the handle straight upward. Wiggling too hard can damage the cartridge stem. I once rushed this step and bent a small retaining piece, so patience matters. If the handle will not move, use a handle puller rather than prying against the faucet body. Stop if the metal begins to crack or the valve feels loose. A plumber should inspect seized parts or hidden leaks. Before reassembly, photograph each piece and note its position. This small record helps when the handle has several washers or adapters.

Inspect and Replace Worn Screws, Washers, or Internal Parts

A loose faucet handle often points to a small part, not a complete faucet failure. Turn off the water supply before removing the handle. Cover the drain to protect tiny screws from disappearing. Check the handle screw for stripped threads, rust, or a missing washer. A worn screw may let the handle wobble even when the valve works correctly.

Remove the screw carefully, then lift the handle without forcing it. Inspect the washer beneath the screw and replace it if it looks flattened, cracked, or brittle. If the handle still slips, examine the stem, cartridge, or internal splines for wear.

I once blamed a loose handle on the cartridge, but the real problem was a thin washer compressed beyond use. Small parts can mislead you. Match replacements by size and shape, not appearance alone. Tighten the screw firmly, but avoid excessive force that could damage the threads.

Tips: Take a photo before disassembly. Keep parts in a small dish. Apply a light layer of plumber’s grease only where appropriate. Test the handle slowly after restoring water pressure. If the internal valve feels gritty, leaks beneath the handle, or resists movement, stop and consult a qualified plumber. A replacement part may fit loosely, even when it seems correct.

Reassemble the Handle and Restore the Water Supply

After replacing or cleaning a faucet handle, reassembly must be careful and deliberate. Turn the water supply off before touching the valve. Place a towel over the drain to catch small screws. Check the handle, adapter, screw, and decorative cap for damage or missing parts. I once overlooked a worn screw, and the handle loosened again within a week.

Slide the handle onto the valve stem in its original position. The handle should sit firmly without forcing it. Insert the retaining screw and tighten it with the correct screwdriver. Stop when it feels secure. Over-tightening can crack the handle or damage the valve stem. Press the decorative cap into place only after checking its alignment. A crooked cap usually means the handle is not seated correctly.

Tips: Keep parts in order during disassembly. Take a clear photo before removing anything. Restore the water supply slowly, then move the handle through its full range. Watch the stem and base for drips. If water appears, shut the supply off and inspect the seal or screw. A slight wobble may seem harmless, but it often becomes a leak later. When the handle feels stiff, do not force it; internal mineral buildup may need cleaning or professional attention.

Test the Faucet and Prevent Future Handle Damage

What Is the Best Way to Fix a Faucet Handle?

Test the Faucet and Prevent Future Handle Damage

A loose faucet handle often needs a simple adjustment, not brute force. Turn off the water supply beneath the sink. Remove the decorative cap, then tighten the retaining screw gently. Use the correct screwdriver to avoid stripping the screw head. I once tightened a handle too aggressively. The movement stopped, but the internal cartridge later failed. That mistake changed how I make repairs.

After reassembly, test both temperature directions and the water flow. Move the handle slowly through its full range. Check underneath the sink for drips, especially around the supply connections. Run the faucet for thirty seconds, then close it firmly without forcing it. Watch the spout for a few minutes. A slow drip can reveal a damaged seal or misaligned cartridge.

Keep the handle area clean and dry. Mineral deposits can make movement stiff and encourage excessive pressure. Wipe away buildup with a soft cloth and a suitable mild cleaner. Do not use the handle as a support when standing or pulling yourself up. Small habits matter. If the handle remains difficult to move after cleaning and adjustment, replace the worn internal part. I sometimes overlook this step and waste time repeating the same adjustment. A careful test prevents that cycle and helps protect the faucet from future damage.

FAQS

Why does a faucet handle wobble?

A loose screw, worn washer, or damaged adapter often causes wobbling. Check these small parts before replacing the cartridge. Small parts mislead.

What should I do before removing the handle?

Close both shutoff valves beneath the sink. Open the faucet briefly to release pressure. Cover the drain with a cloth.

Which tools are useful for this repair?

Keep a screwdriver, Allen key, adjustable wrench, flashlight, and small container nearby. A handle puller may help with a seized handle.

How can I remove a decorative handle cap safely?

Lift the cap with a thin flat tool. Protect the finish with tape. Loosen the screw slowly, then pull the handle upward.

Why should I photograph the faucet before disassembly?

A photo records each washer, adapter, and screw position. It helps when several similar pieces appear during reassembly. Memory can fail.

How do I know whether a washer needs replacement?

Replace a washer that looks flattened, cracked, brittle, or compressed. Match the new part by size and shape, not appearance alone.

What if the handle will not move?

Do not pry aggressively against the faucet body. Use gentle penetrating oil where suitable, or try a handle puller. Stop if metal cracks.

When should I contact a qualified plumber?

Seek help if the valve body twists, leaks beneath the handle, or feels gritty and resistant. Hidden damage is easy to underestimate.

Conclusion

Fixing Faucet Handle problems begins with identifying the symptom, such as a loose grip, dripping water, stiffness, or difficulty turning. Gather basic tools, including a screwdriver, adjustable wrench, replacement screws, washers, or compatible internal components. Before starting, shut off the water supply and open the faucet briefly to release remaining pressure. Carefully remove the handle, keeping small parts organized to make reassembly easier.

Inspect the handle, screw, washer, cartridge, or valve components for wear, corrosion, or damage, and replace any faulty parts with suitable replacements. Reattach the handle securely without overtightening, then restore the water supply gradually. Test the faucet by turning it on and off several times, checking for leaks, wobbling, or unusual resistance. Regularly cleaning the handle, avoiding excessive force, and addressing small leaks early can help prevent future damage and extend the faucet’s service life.

Aria

Aria

Aria is a dedicated marketing professional with a deep passion for innovative strategies and a keen understanding of our company's product offerings. With a wealth of experience in the industry, Aria excels at crafting engaging content that highlights the unique features and benefits of our......